
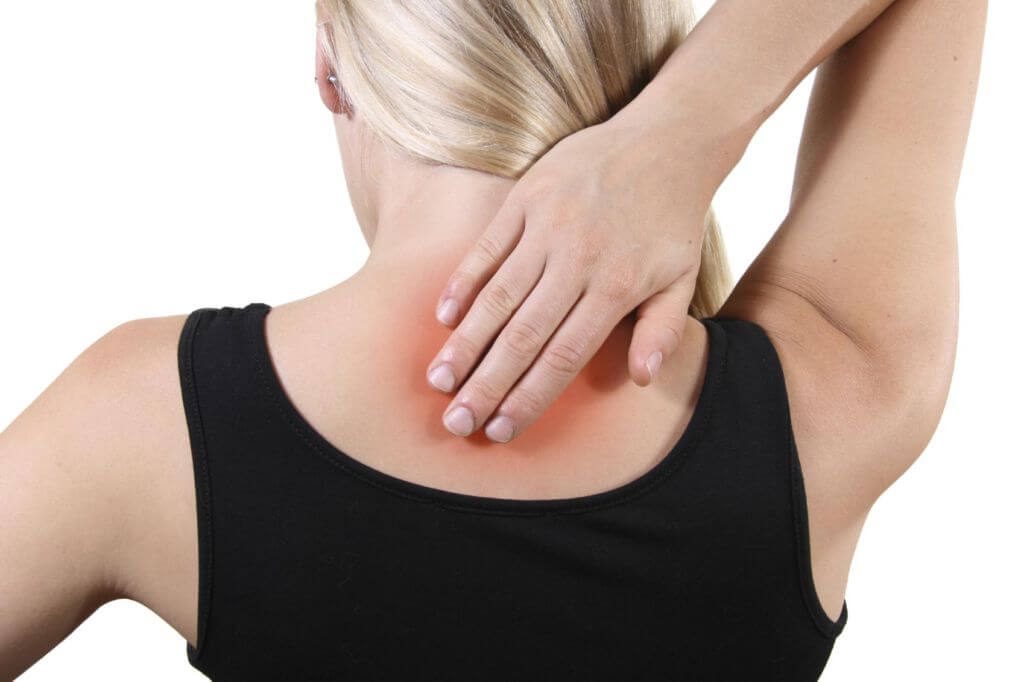
Neck pain can lead to headaches and can even lead to injury, practicing yoga is an excellent way to get rid of neck pain. One study also found that people who practiced yoga for 9 weeks experienced pain relief and improved functioning. Through practice, you can learn to reduce any tension in your body. Yoga can also be useful in treating chronic neck pain. The great yoga masters of India have created many yoga asanas to cure the problem of neck pain. Yoga Teacher Training in Bali, The practice of these yoga asanas is not only easy but it also proves beneficial for other parts of the body, therefore, in this article, we will give you information about 5 yogasanas that can relieve neck pain. With the regular practice of these yoga poses, you too can get permanent relief from the problem of neck pain.
Yoga asanas for neck pain:
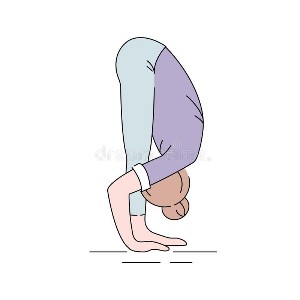
1. Uttanasana
Uttanasana is a hatha yoga style asana of moderate difficulty, the duration of which should be between 15 and 30 seconds. No repetition is required in this, during the practice of Uttanasana, the head has to be taken near the knees. Due to this, the pressure on the muscles of the neck increases, and due to the increase in flexibility in it, the problem of pain also decreases.
Method of Uttanasana:
- First, stand straight on the yoga mat and keep both hands on the hips.
- While inhaling, make the knees soft.
- Lean forward while bending at the waist.
- Try to balance the body.
- Move the hips and tailbone slightly backward.
- Slowly lift the hips upwards and the pressure will start coming on the upper thighs, hold the ankles from the back side with your hands.
- Your feet will be parallel to each other and your chest will touch the top of your feet, with a wide space between your chest bones and pubis.
- Press the thighs inward and keep the body stable on the heels and tilt the head down and keep looking through the legs, in this position remain stable for 15-30 seconds.
- When you want to release this position, contract the abdomen and lower limbs, inhale and place the hands on the hips.
- Slowly rise upwards and stand up as normal.
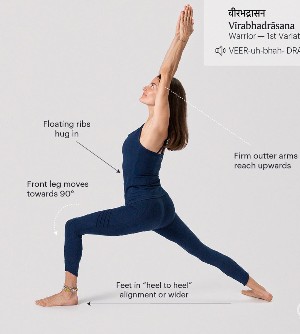
2. Virabhadrasana-2
Virabhadrasana-2 is considered a beginner-level or easy asana. It is done in Vinyasa style, it is recommended to do it for 30 seconds on one leg. It is repeated only once, regular practice of Virabhadrasana-2 provides relief from swelling and pain in the spine, back, and neck. Stretching the muscles around the lower back and flexing the hips allows pain to spread to the muscles of the lower back as well as the neck, helping to reduce muscle stiffness and inflammation. With this, the yogi not only gets relief from back pain but also from the pain caused by the movement of the neck.
Method of doing Virabhadrasana-2:
- Stand straight on the yoga mat.
- Spread both legs 3-4 feet.
- Bend the right leg outward at a 90-degree angle.
- Turn the left leg inward at a 15-degree angle.
- Keep in mind that the heel of the right foot should be in line with the middle part of the left foot.
- Raise the hands up to the level of the shoulders on the sides.
- The palm will remain upward.
- Both hands will remain parallel to the ground.
- Take a deep breath inward.
- While exhaling, bend the right knee.
- Keep in mind, the right knee will not go beyond the ankle and the right knee and right ankle will remain in a straight line.
- Now, slowly turn your head and look to your right.
- Balance the body. Relax and become comfortable.
- Now stretch the hands and slowly press the pelvis down, keep a smile on your face and keep breathing continuously.
- Take a deep breath and come out of the posture.
- While exhaling, lower the hands and repeat the same posture with the left leg.
- Turn the left leg outward at a 90-degree angle.
- Turn the right leg inward at a 15-degree angle.
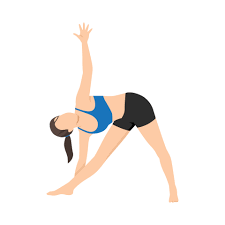
3. Utthita Trikonasana
Utthita Trikonasana is also called Extended Triangle Pose in the English language, it is advisable to practice Utthita Trikonasana for 30 to 60 seconds. Its practice can be repeated once. Continuous practice of Utthitta Trikonasana strengthens the ankles, thighs, and knees, thereby stretching the ankles, groin, thighs, shoulders, knees, hips, calves, hamstrings, thorax, and ribs. The practice of Utthita Trikonasana Yoga is also recommended for those who have desk jobs, its regular practice increases flexibility in the body, and it helps to prevent any problems in the neck muscles in the future.
Method of doing Utthita trikonasana:
- Stand straight on the yoga mat.
- Make a gap of 3.5 to 4 feet between the two legs.
- The right leg should be out at 90 degrees and the left leg should be at 15 degrees.
- Line up the center point of your right heel with the center of the arch of your left foot, making sure your foot is pressing into the ground.
- The weight of the body should be falling equally on both feet.
- Take a deep breath and exhale slowly.
- While exhaling, bend the body from under the hips to the right and while turning the body, the waist will remain straight.
- Raise the left arm up and touch the ground with the right hand.
- Both hands together will make a straight line.
- Place the right hand on the shin, ankle, or right foot resting on the ground.
- Wherever the hand may be, the side of the waist should not deteriorate and the left hand should be stretched above the shoulder towards the ceiling.
- Keep the head in the normal position or turn it to the left.
- In an ideal situation, your vision will be fixed on the left palm.
- Body leaning to the side, neither forward nor backward, and your chest and pelvis should be wide and open.
- Now stretch as much as possible and focus on keeping the body stable.
- Keep breathing long and deep and feel the body more relaxed as you exhale.
- Inhaling deeply leaves the body loose.
- Place the hands on the sides and straighten the legs, now repeat the same process with the left leg.

4. Gomukhasana
With the practice of Gomukhasana, you can get rid of many problems such as shoulder stiffness, neck pain, and cervical spondylitis. This asana of yoga is very easy to do, it is the most popular asana in the category of hatha yoga, this asana is very beneficial to reduce weight and making your body beautiful, Gomukhasana is beneficial for our shoulders and thighs. Strengthens muscles.
Method of doing Gomukhasana:
- Sit on the yoga mat in Sukhasana or cross-legged posture.
- Pull the left leg towards your body and bring it close to you.
- Place the right leg on the thighs of the left leg, pull this leg also and bring it close to your body.
- Place the right hand over the shoulder.
- Bend the arm at the elbow and take it behind your back as far as possible.
- Bend the left hand also from the elbow.
- Take it from the side of the stomach to the back of the back.
- Now try to join both hands by pulling them together.
- Hold the hands together behind the back, stay in this posture for some time and breathe 10-12 times.
- When there is discomfort in this position, then you come back to the starting position, open both hands and straighten the legs.
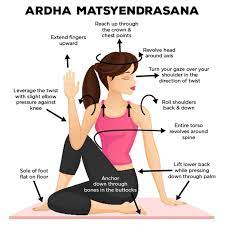
5. Ardha Matsyendrasana
Practicing Ardha Matsyendrasana regularly makes the body flexible and especially the hip and spine. Along with this, this asana is also beneficial for the shoulders and neck and fills the body with energy, most people initially practice this asana under the supervision of a yoga expert. But after a few days of practice, it becomes very easy to do this asana.
Method of doing Ardha Matsyendrasana:
- Sit in Dandasana on the yoga mat.
- Lightly press the ground with your hands.
- While inhaling, lengthen the spine.
- Bend the left leg and now place the left foot on the ground above the right knee.
- Now bend the right leg and place the foot on the ground near the left buttock.
- Bring the right hand over the left leg and hold the toe of the left foot, while exhaling, bend the torso as much as possible.
- Now bend the neck so as to focus the gaze on the left shoulder, rest the left hand on the ground and breathe normally.
- Stay in the pose for 30-60 seconds.
- To get out of the posture, do all the steps in reverse order, then repeat all these steps on the other side as well.